LEDautomotive.com

  • LED Technology

    LEDs are the future of automotive lighting. We do our best to stay on top of the latest LED technology to bring you the best, brightest LEDs available.
  • Automotive Kits

    There are multiple LEDs that will fit a particular application. We test each type of LED to ensure that that we offer the best possible solution for your needs.
  • Eco-friendly

    LEDs are better for the environment than regular bulbs. They use less energy and do not contain any hazardous materials or gasses..
  • LED Types

    Our LED lamps utilize standard miniature, high flux, high powered and ultra high powered LEDs.
  • Multiple Colors

    We offer 4 main colors to choose from. Most of our LED lamps come in white, blue, red and green colors.

Cart  

(empty)

SOLDERLESS LED AIMING INSTRUCTIONS


Before proceeding with the following, you may want to install the LEDs to see how they look with no modification. If the button (or clock) does not light up bright enough or evenly enough, the following steps will help.

PLEASE NOTE:
It is very easy to break the LED when doing the following modification. Follow these instructions very carefully and at your own risk.


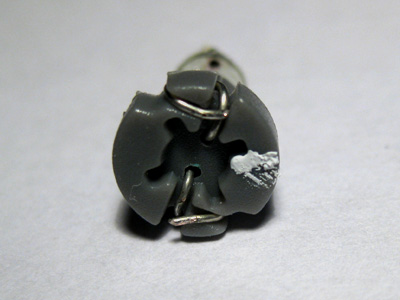
1. Unwind the two contact leads. You might need a used staple or something to pick the leads out of the grooves. Make sure the leads are as straight as possible (This is IMPORTANT!)


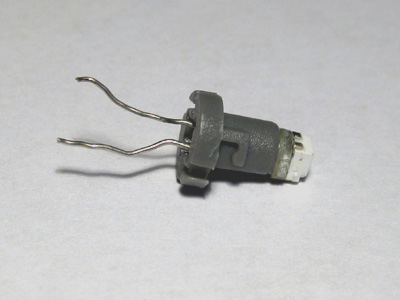
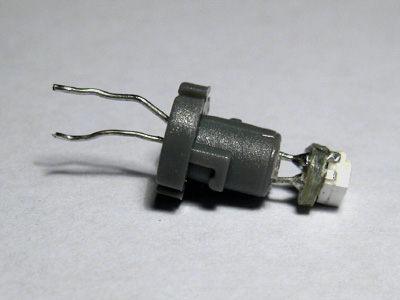
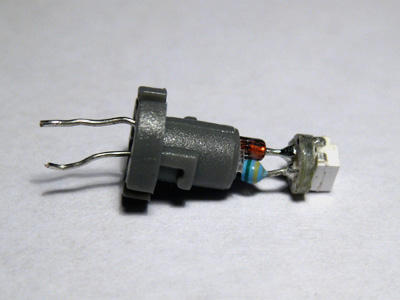
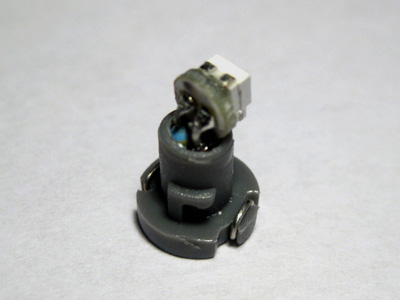
2. Now pull the LED out of the plastic holder very CAREFULLY until the electronics inside are just at the opening of the plastic base. If you feel any resistance when pulling the LED out, check the leads again to make sure they are as straight as possible.  You will want the LED pulled out just slightly more than shown below but not as far as the 2nd picture. Then re-wrap the contacts around the base.


3. Insert the LED into the button (or clock) to figure out which way the LED is to be installed. Once the LED has been installed, check to see if it lights up. If it does not light up, take it out and rotate it 180 degrees (1/2 a turn) and try again. Once you know which way it goes in, make a mark on the side of the LED (you can use white-out) that is closest to the button face (or the clock's LCD screen).

4. Now bend the LED toward the mark you made in the step above. BE VERY CAREFUL not to break the solder joint on the back of the LED. Bending the LED should take very little pressure. Do not keep adjusting the bend as this will weaken the wires and the solder joints. Also, be sure the 2 wires do not touch each other.


5. Re-install the LED into the button (or clock).


HomeHome