CLIMATE CONTROL INSTALLATION GUIDE
94-97 Honda Accord
*Please read this all the way through before doing this install!*
| We will not be held responsible for any mistakes, problems, or damage done to any part of your car. Follow this install guide carefully, and you should have no problems. If you are unsure about ANYTHING, please email us. We will help you out to the best of our ability. |
| Here Is What You Will Need: |
|
- Phillips head screw driver
- Flat head screw driver
|
In order to get to the climate control, we have to remove the lower console. Start by removing the shift knob:
Automatic transmission - Remove 2 screws from shift knob and remove.
Manual transmission - Simply unscrew the shift knob.

Open the storage compartment lid and remove the bottom. There are 2 screws to remove.
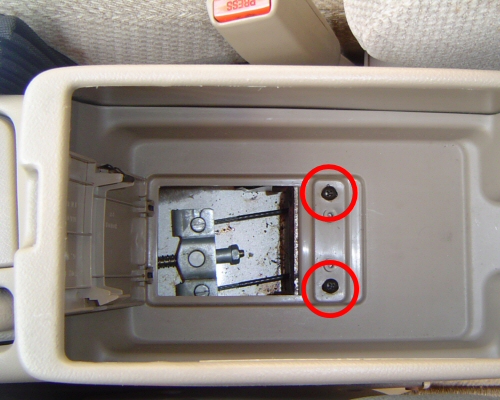
Remove the cup holder by pulling it straight up. Remove the 3 screws located where you removed the cup holders. Pull up the parking brake and lift the rear section of the console while unhooking it from the front section.
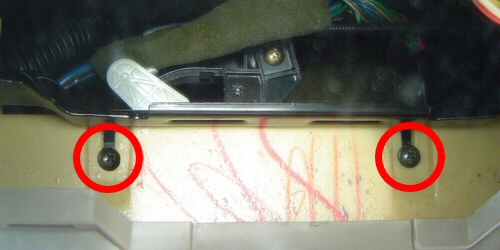
Remove the ashtray by pulling it out and remove the screw that is behind it. Remove the 2 screws shown in the picture below.

Lift the front section of the console to unclip it. Disconnect any wires.
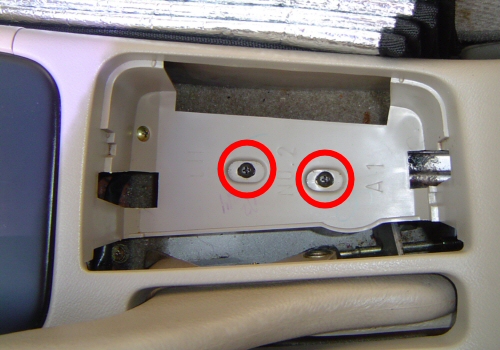
Remove the two screws that are above the stereo holding in the climate control. You may have to remove the stereo. The picture below points to where the screws are located.
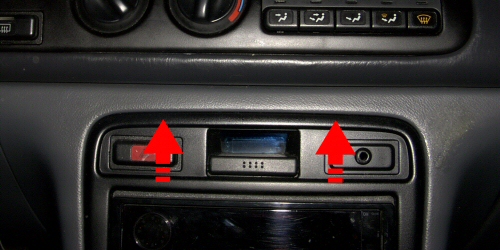
Next remove the cruise, sunroof and rear defrost button as well as the dimmer control. Remove the screws that are behind the cruise/sunroof buttons and the rear defrost button.
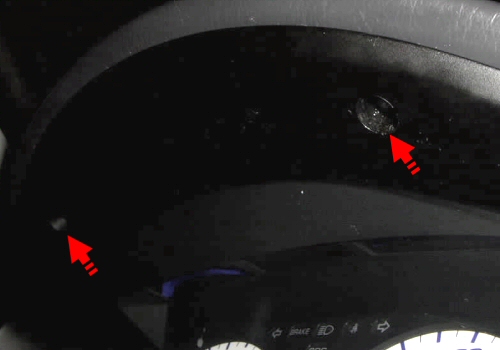
Remove the 2 screws that are located above the gauge cluster.
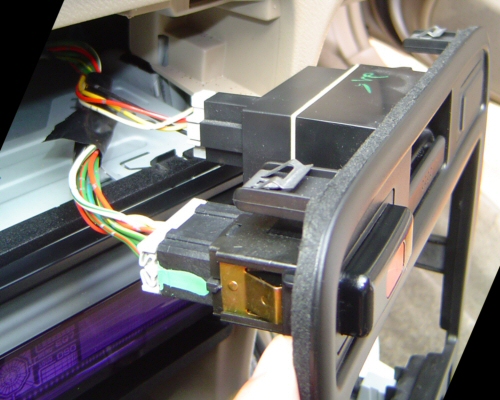
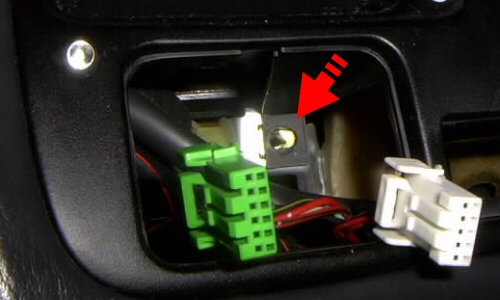
Pull the bezel sharply to detach the clips. It will take some finesse to get it out. Once it is out, flip it up so you see the underside of the climate control. Disconnect the 2 wire harnesses, and remove the screw and bracket that holds the temp control cable. The red arrow in the picture below pints to the screw that must be removed. The blue arrow shows the heat control cable.
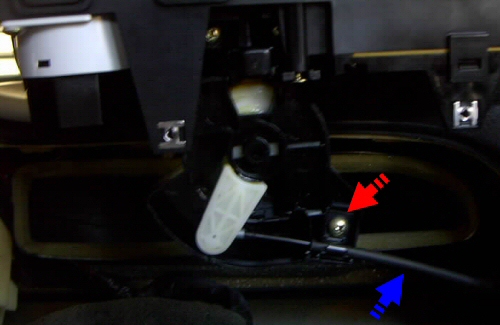
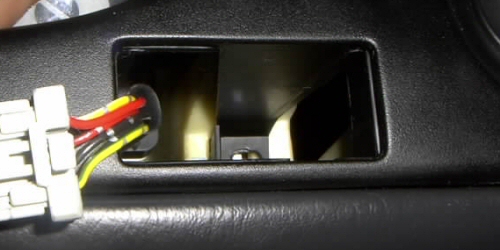
Remove the cable by sliding the end off the plastic post. It is a little tricky to remove. It is a little harder to reinstall. When reinstalling, put the end of the cable back over the plastic post. You will see marks in the black part of the cable where the bracket was located. Just line up the marks where the bracket will go, put the bracket back on and install the screw.
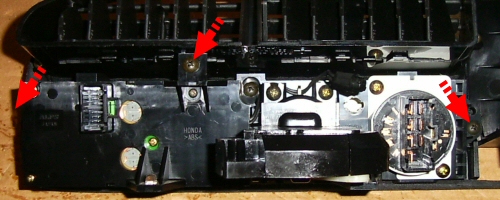
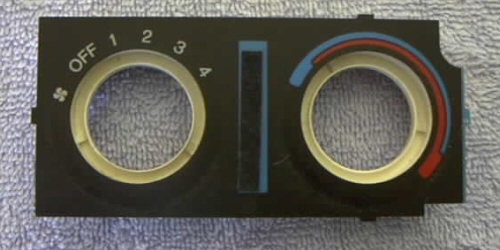
Now remove the screws that hold the climate control to the bezel. The pictures below points to all the screws that need to be removed.
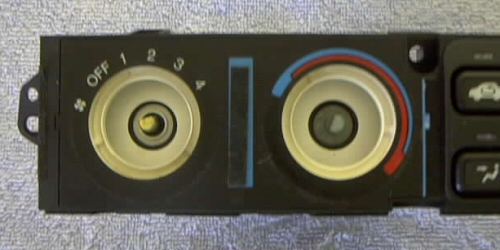
The next 3 steps are optional, but will make the fan speed and temp knobs light up brighter.
Remove the 2 knobs on the front of the climate control unit.
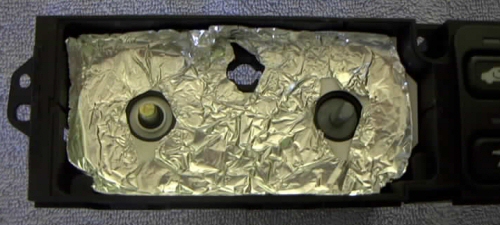
Remove the front panel. It is just clipped in.
Line the back of the panel and inside of the climate control with tin foil.

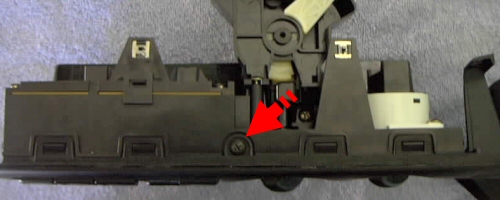
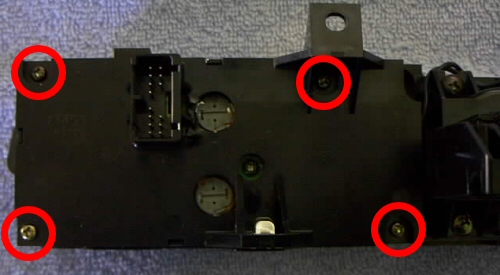
Remove the screws shown in the picture below.
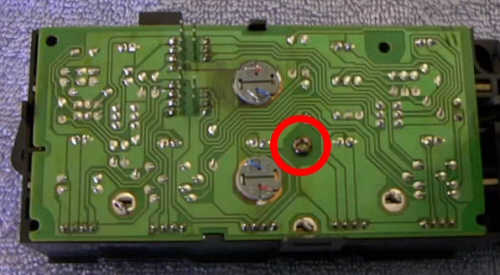
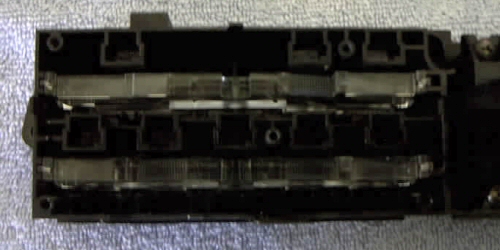
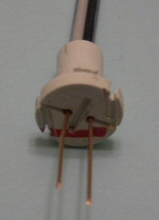
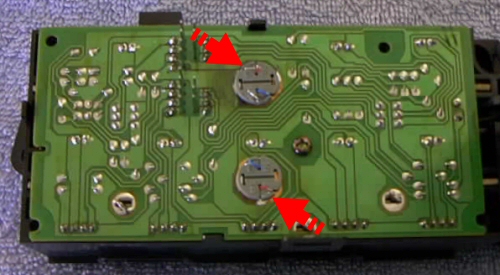
Remove the the light bulbs by turning them 1/4 turn counter-clockwise and lifting out. Also remove the bulb that lights up the knobs the same way. Next, remove the screw that is securing the circuit board.
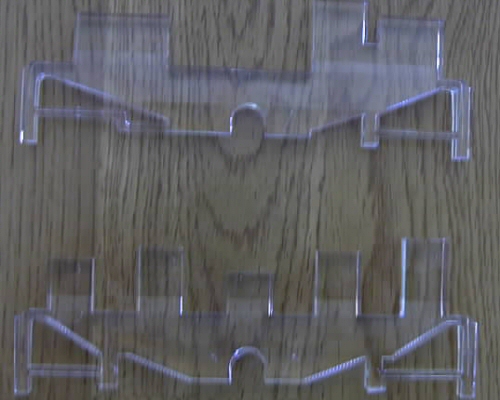
To remove the circuit board, lift straight up. Now remove the clear plastic light distributors.
Slide the LED inserts into the same grooves that the light distributors used. Be sure to put the insert that has 3 LEDs on the top and the one with 5 LEDs on tech bottom. Also note "this side up" printed on each board.
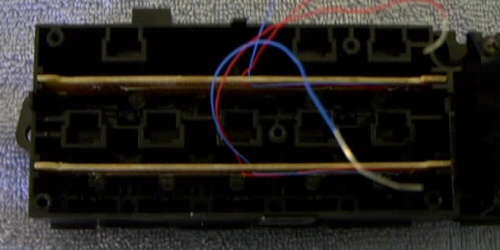
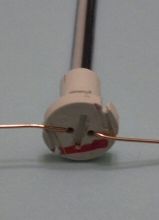
Reinstall the circuit board and pull the wires from the LED inserts through the holes where the stock bulbs were located. Reinstall the screw to secure the circuit board. Remove the bulbs from the plastic base and pull the wires through the holes in the plastic bulb base.
Make sure to pull the wires through the plastic bulb holders until you cannot pull them anymore. Now wrap the wire around the bulb holder in the same way that the stock bulb was.
  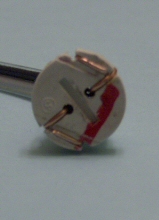
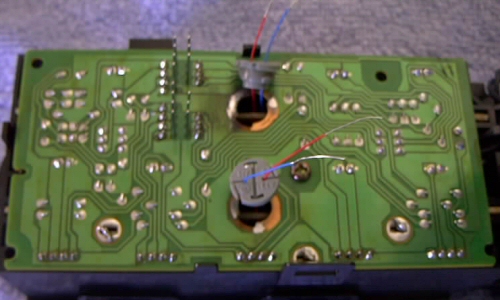
Take note as to which side of the bulb holder the white wire goes to. This is the positive wire. Put the bulb holder in the board and turn 1/4 turn clockwise to secure into place. The arrows in the picture below are pointing to the positive contact on the circuit board.
Install the wedge LED into the holder that lights up the knobs. Make sure you test before you install everything back in the car, If this light does not light up, simply rotate it 180 degrees and test again. The best way to rotate it is:
1. Unlock the LED and plastic base - approx 1/4 turn counter clockwise so it can be removed.
2. Pull the LED out of the base and turn it 1/2 a turn (180 degrees)
3. Put it back in the base
4. Twist it to lock it in (approx 1/4 turn clockwise).
|

 LED Technology
 Automotive Kits
 Eco-friendly
 LED Types
  Multiple Colors