GAUGE CLUSTER INSTALLATION GUIDE
99-03 Acura TL & 01-03 Acura CL
*Please read this all the way through before doing this install!*
| We will not be held responsible for any mistakes, problems, or damage done to any part of your car. Follow this install guide carefully, and you should have no problems. If you are unsure about ANYTHING, please email us. We will help you out to the best of our ability. |
| Here Is What You Will Need: |
- Phillips head screw driver
- Flat head screw driver
- Small needle nose pliers
- Crescent wrench
- Upholstery fastener remover (optional)
|
*NOTE* Do not turn the ignition to the 'on' position while the gauge cluster is removed.

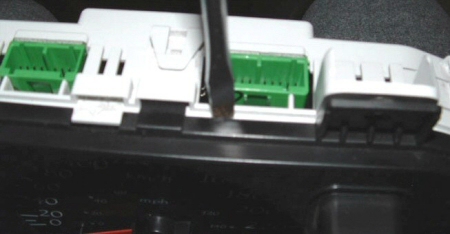
Follow the steps in the Climate Control Install Guide to remove the trim panel. Next, remove the 4 philips screws shown in the pictures
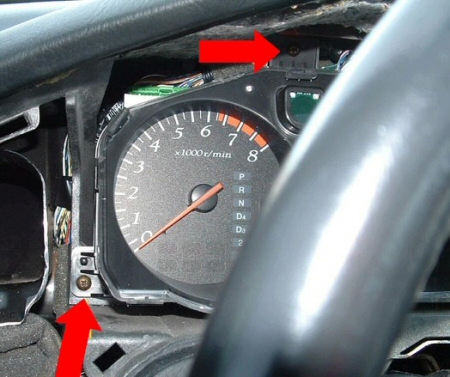
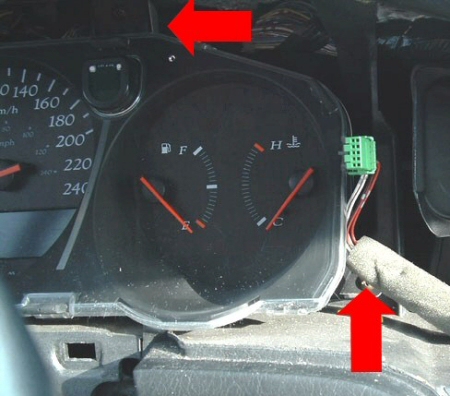
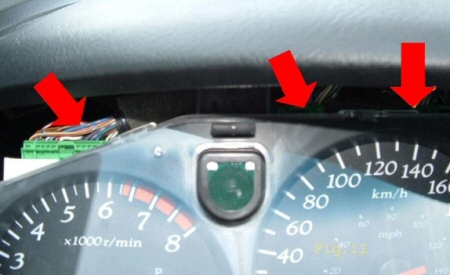
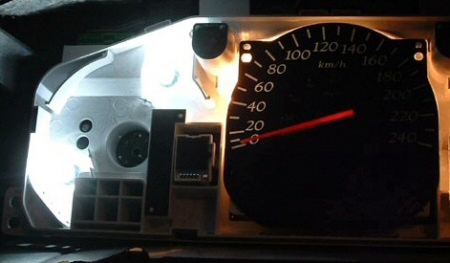
Remove the 3 harness connectors on the top of the gauge cluster.
Remove the clear plastic cover by using a flathead screwdriver to wedge out the plastic as your finger presses down on the tab. Repeat for all the tabs until removed.
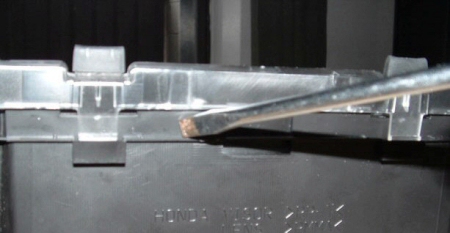
Repeat the procedure for the black plastic housing as well.
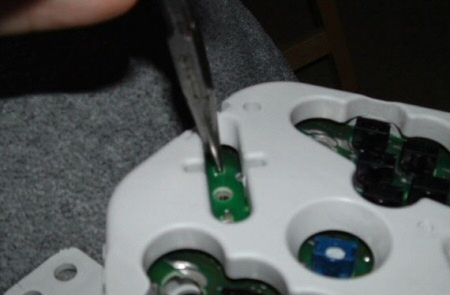
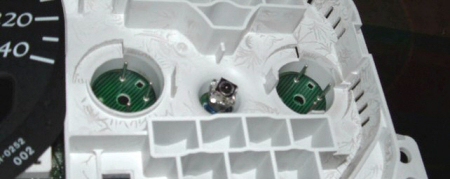
Since the LEDs are too large to fit through the hole in the back of the cluster, we have to install them from the inside. To do this we have to remove the gauge faces. Look at the back of the cluster, you will see silver tabs with a silver center. These are where the gauge faces are mounted. Take needle nose pliers to bend the tabs up so they will fit through the slot. Then push the center silver tab with the nose of the pliers. It should be enough to push it outward and remove. Repeat for all. The temp and fuel gauge are one set but have 4 tabs to bend up. Do not try to force on one tab too much before working on the other ones.
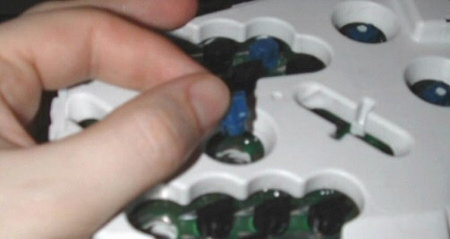
Once that is complete, you will see the bulbs underneath that are used to illuminate the gauges. Remove them and remove the bulb from the blue bulb holder. Use a Kleenex as your fingers could be too slippery to remove them. Don’t use pliers as you’you will end up breaking them and making a mess. Reinstall the empty bulb holder.
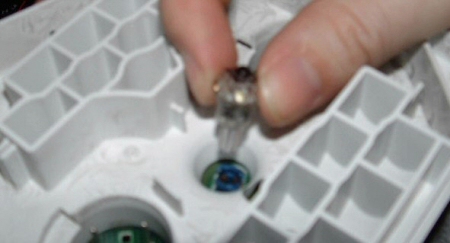
From the front side, install the LED into the blue bulb holder. Repeat for all sockets. Your LED will look different from the one pictured.
Before you re-install the gauge faces, test the LEDs to make sure they are in correctly. Connect the wire harness and turn on your lights. If any of the LEDs do not light up, take them out and rotate them 180 degrees (1/2 a turn). Here is the white LED next to the stock bulb.
Carefully reinstall gauge faces back in place, with light pressure, press down until you hear a click. That means the gauge is now installed properly.
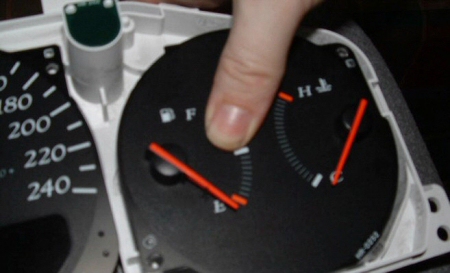
Re-bend the tabs on the back of the cluster to lock the gauges in place. Re-install the black housing and the clear cover. Connect the wire harnesses and install the gauge cluster.
|

 LED Technology
 Automotive Kits
 Eco-friendly
 LED Types
  Multiple Colors