CLIMATE CONTROL & CLOCK INSTALLATION GUIDE
99-03 Acura TL & 01-03 Acura CL
*Please read this all the way through before doing this install!*
| We will not be held responsible for any mistakes, problems, or damage done to any part of your car. Follow this install guide carefully, and you should have no problems. If you are unsure about ANYTHING, please email us. We will help you out to the best of our ability. |
| Here Is What You Will Need: |
- Phillips head screw driver
- Flat head screw driver
- Small needle nose pliers
- Upholstery fastener remover (optional)
The following items are not needed for solderless kits
- A fine point soldering iron ($8 - RadioShack part number: 64-2051)
- Solder (can be found at RadioShack for around $4)
- Tweezers
- Crescent wrench
|
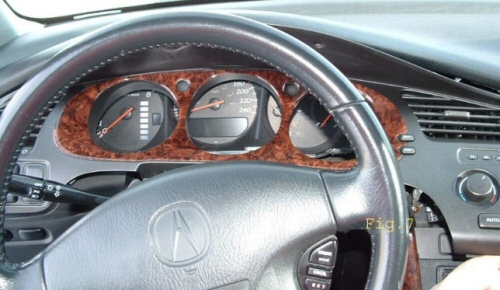
To remove the Climate Control and Clock to perform the LED conversion, first lower your steering wheel to the lowest position. Carefully remove the top cover on the steering column. There are 2 lock tabs near the back of the cover on both sides. Use a flathead screwdriver to pop them loose. Once the cover is removed, there are two screws that need to be removed.

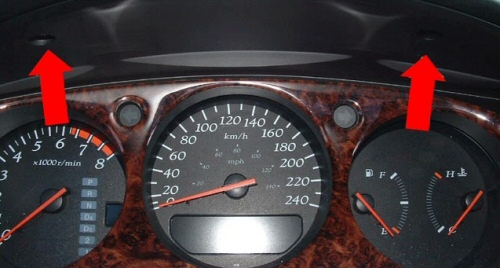
Then remove the screws from the top of the panel.
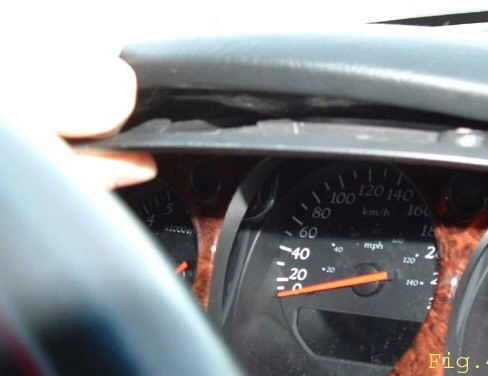
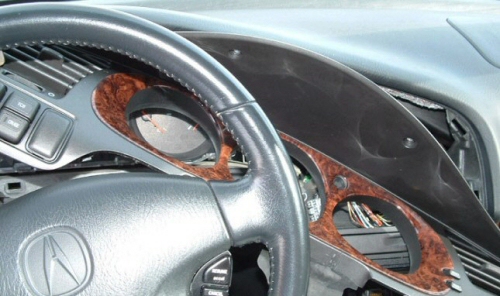
Use the flathead screwdriver or an upholstery fastener remover to slide underneath the top part of the panel just enough to grab it with your fingers. It will take some time and work to remove the trim piece. Just use caution and take your time.
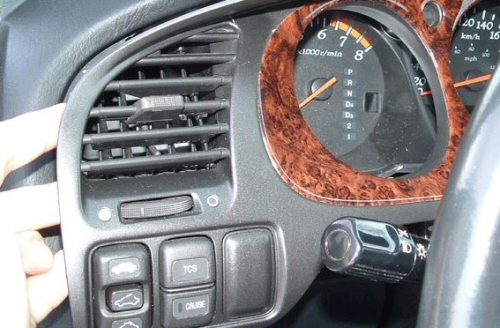
Maneuver the loose panel enough to get your fingers behind it and find the wiring harnesses behind the panel. Push locking tabs on the harness connectors and pull them out to remove them. There are 2 attached to the climate control unit, 1 to the clock, 1 to the reset/select buttons and 1 to the hazard button. On the other side of the panel there are 3 more connectors. One for each button (sunroof TCS/Cruise and Fog light)
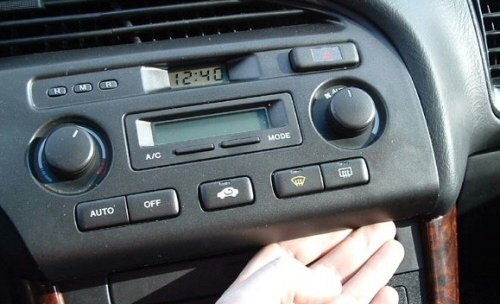
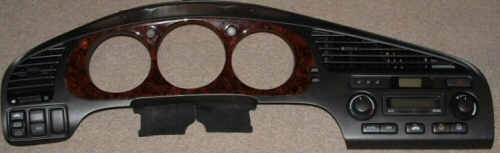
Once all connectors are removed, remove the panel. It will take some time and work to remove the trim piece. Just use caution and take your time.
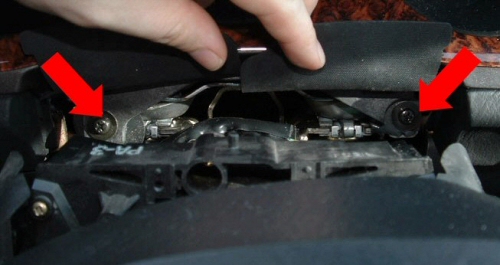
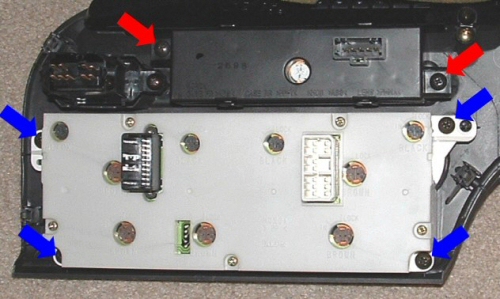
With the whole panel removed, you can turn it over and remove the climate control unit and the clock. To remove the climate control from the panel, remove the 4 screws shown in the picture by blue arrows. To remove the clock from the panel, remove the 2 screws shown in the picture by red arrows. If you purchased the button kits this is a perfect time to remove the buttons for installation. Take all these items inside to complete the install.
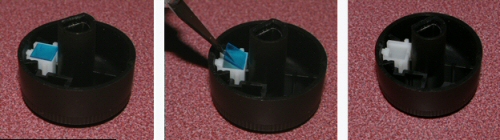
Pull the knobs off the front of the climate control and remove the filters that are in the knob itself
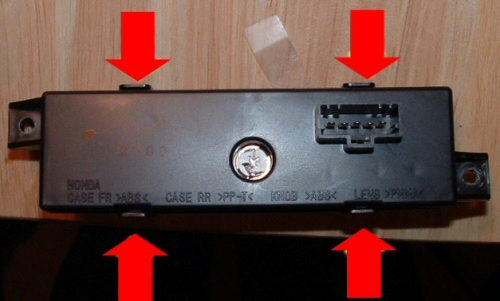
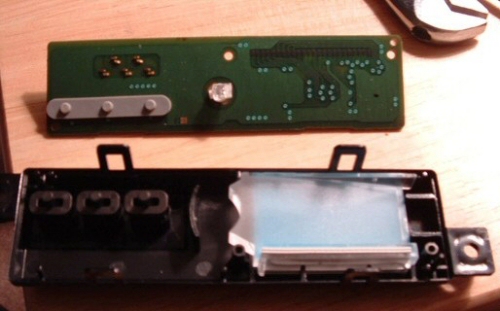
The next 3 steps are optional, but will make the clock light up brighter. Remove the back of the casing of the clock by unclipping the 4 tabs
Remove the two screws shown in the picture.
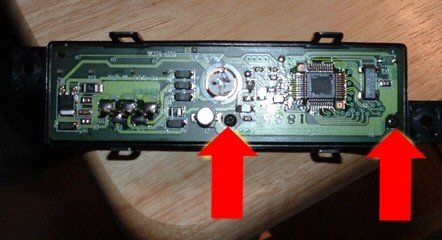
Remove the circuit board from the plastic housing. Don’t worry if the LCD falls off (just don’t drop it) as it is just seated there. Remove the blue filter.
Remove all the bulbs from the climate control and the one from the clock. This is done my rotating the bulb counter clockwise about 1/4 of a turn and lifting it out of the unit.
Bulb To LED Conversion (For LEDs that require soldering)
Click [here] for the bulb to LED conversion instructions
Installing the LEDs
These pictures show which side is + so you know where the anode (the lead with the resistor) should go. If any LEDs do not light up, simply rotate them 180 degrees and test again. The best way to rotate them is:
1. Unlock the LED and plastic base - approx 1/4 turn counter clockwise so it can be removed.
2. Pull the LED and base out of the hole just enough to turn it 1/2 a turn (180 degrees)
3. Put it back in the hole
4. Twist it to lock it in (approx 1/4 turn clockwise).


|

 LED Technology
 Automotive Kits
 Eco-friendly
 LED Types
  Multiple Colors