CLIMATE CONTROL KIT INSTALLATION GUIDE
01-05 Honda Civic
*Please read this all the way through before doing this install!*
| We will not be held responsible for any mistakes, problems, or damage done to any part of your car. Follow this install guide carefully, and you should have no problems. If you are unsure about ANYTHING, please email us. We will help you out to the best of our ability. |
| Here Is What You Will Need: |
|
- Phillips head screw driver
- Flat head screw driver
The following items are not needed for solderless kits
- A fine point soldering iron ($8 - RadioShack part number: 64-2051)
- Solder (can be found at RadioShack for around $4)
- Crescent wrench
- Tweezers
|
The first thing we need to do is to get the power outlet part away to reach screws holding central console (climate control and radio). Firmly grasp the dash part from the inside and pull it to remove it (5 attach are retaining it) . Be careful not to tear apart the power outlet's cable.
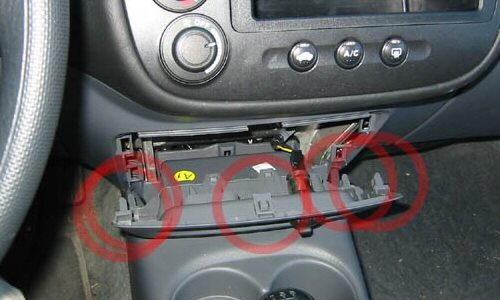

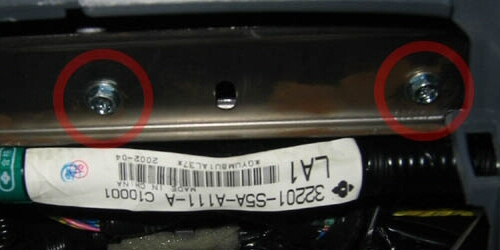
Remove the two screws retaining the frame of the console with the phillips screw driver. Beware, do not drop those screws in the hole behind the power supply, or you wont see them again.
Pull the console from the dash holding it using the hole under the radio. You can help yourself pushing the frame from the inside (you will find it just over the metal bar where you removed the screws previously). The console will come in a block with a lot of wires behind it.
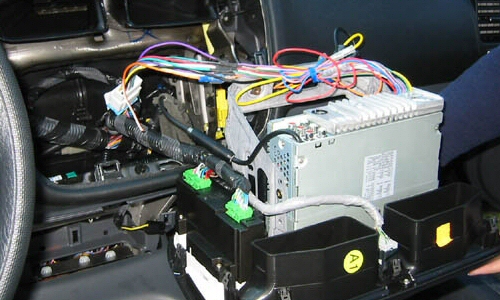
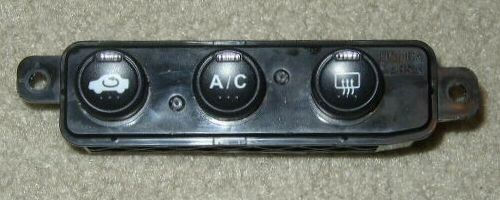
Unplug every cables from the console. Remove the knobs from the climate control.
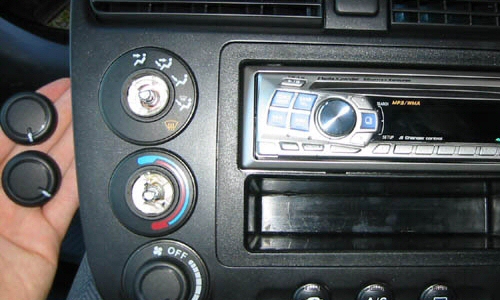
Use a needle or something small to pry off the red filters from the back of each of the 3 knobs.
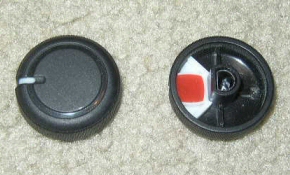 
You'll find the two bulbs of A/C controller behind the console under the radio. You can remove them using the flat head screw driver turning 1/4 turn to the left.
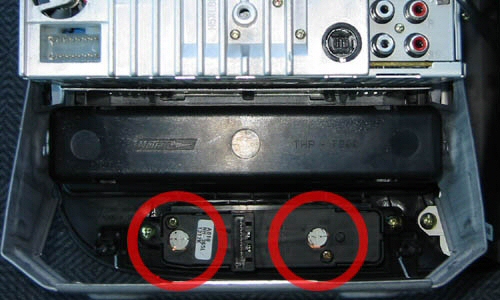
Remove circled screws to pull out the button panel.
Remove the button panel from the climate control.
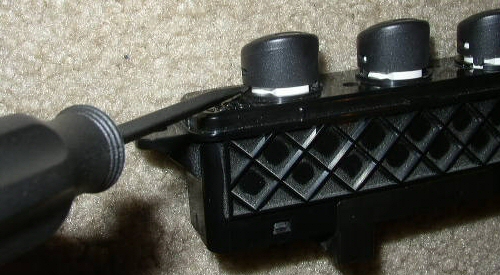
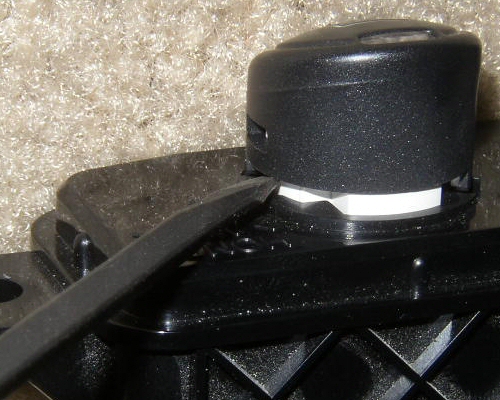
The button covers are held on by clips on each side. Use a small screwdriver and wedge it between the button cover and the panel, then twist the screwdriver to unclip it. Do this on both sides of each button to release the button cover.
After removing all the button covers you see three red filters.
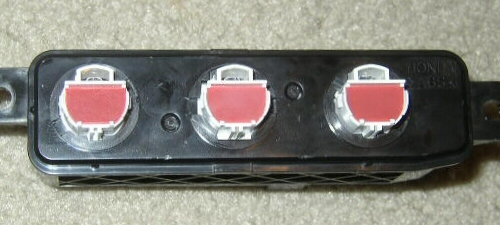
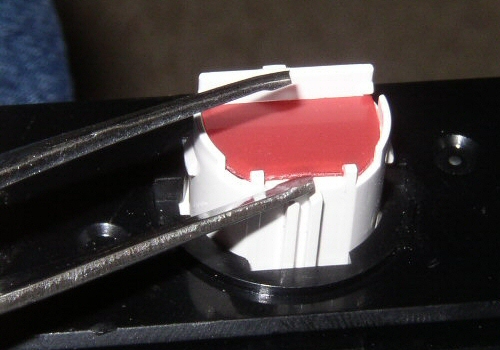
To remove the red filters, use a pair of tweezers. Stick them in between the red and white parts, then lift the filter out.
Here are the buttons without the red filters.
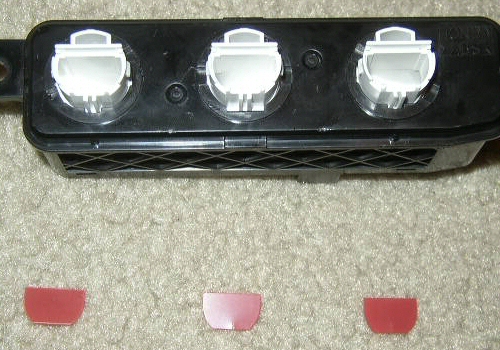
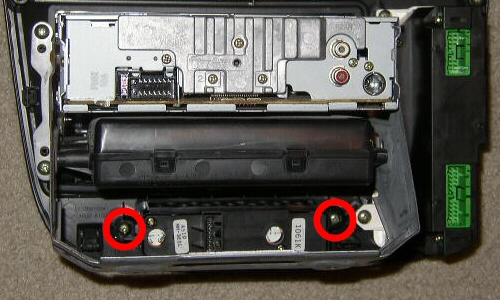
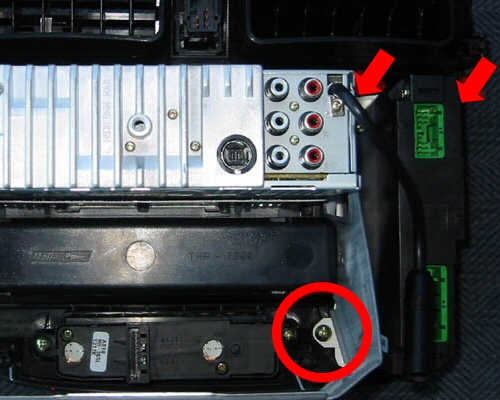
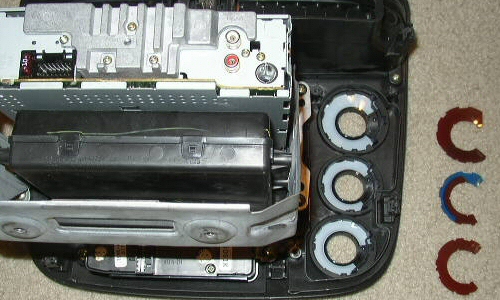
Next, remove the three screws holding the module that contains the 3 knobs. In the picture below there are 2 arrows and a circle. These are the thee screws to remove.
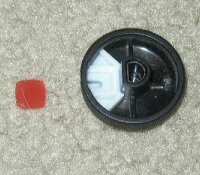
Use a needle or something small to remove the filters from around the knob holes.
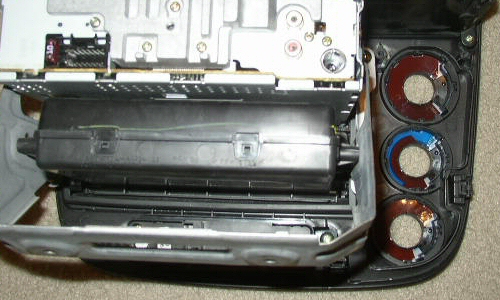
You'll find the two bulbs of vent controller on it side. You can removed them using the flat head screw driver turning 1/4 turn to the left.

Bulb To LED Conversion (For LEDs that require soldering)
Click [here] for the bulb to LED conversion instructions
Installing the LEDs
Insert the LEDs into the climate control and do a test to see if they light up. If any LEDs do not light up, simply rotate them 180 degrees and test again. The best way to rotate them is:
1. Unlock the LED and plastic base - approx 1/4 turn counter clockwise so it can be removed.
2. Pull the LED and base out of the hole just enough to turn it 1/2 a turn (180 degrees)
3. Put it back in the hole
4. Twist it to lock it in (approx 1/4 turn clockwise).
|

 LED Technology
 Automotive Kits
 Eco-friendly
 LED Types
  Multiple Colors